Overview
Before students can complete a survey, the instructor must create it. The instructions on this page are a step-by-step walkthrough on creating the survey, adding items to the survey, and giving it the appropriate settings.
Instructions
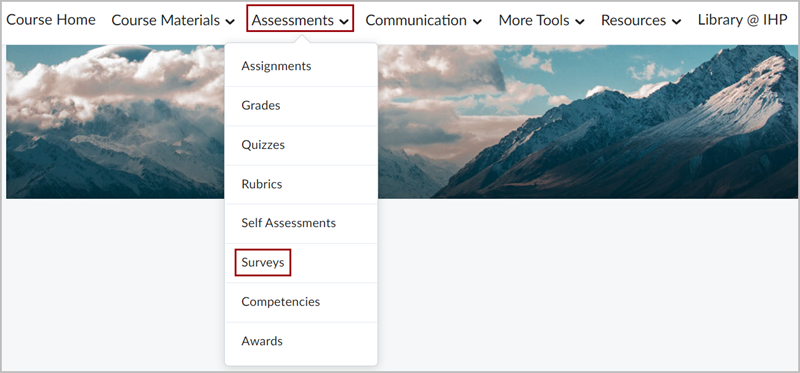
From your course homepage, click on Surveys under the Assessments menu.
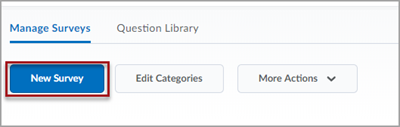
Select New Survey. The new Survey Properties screen will open.
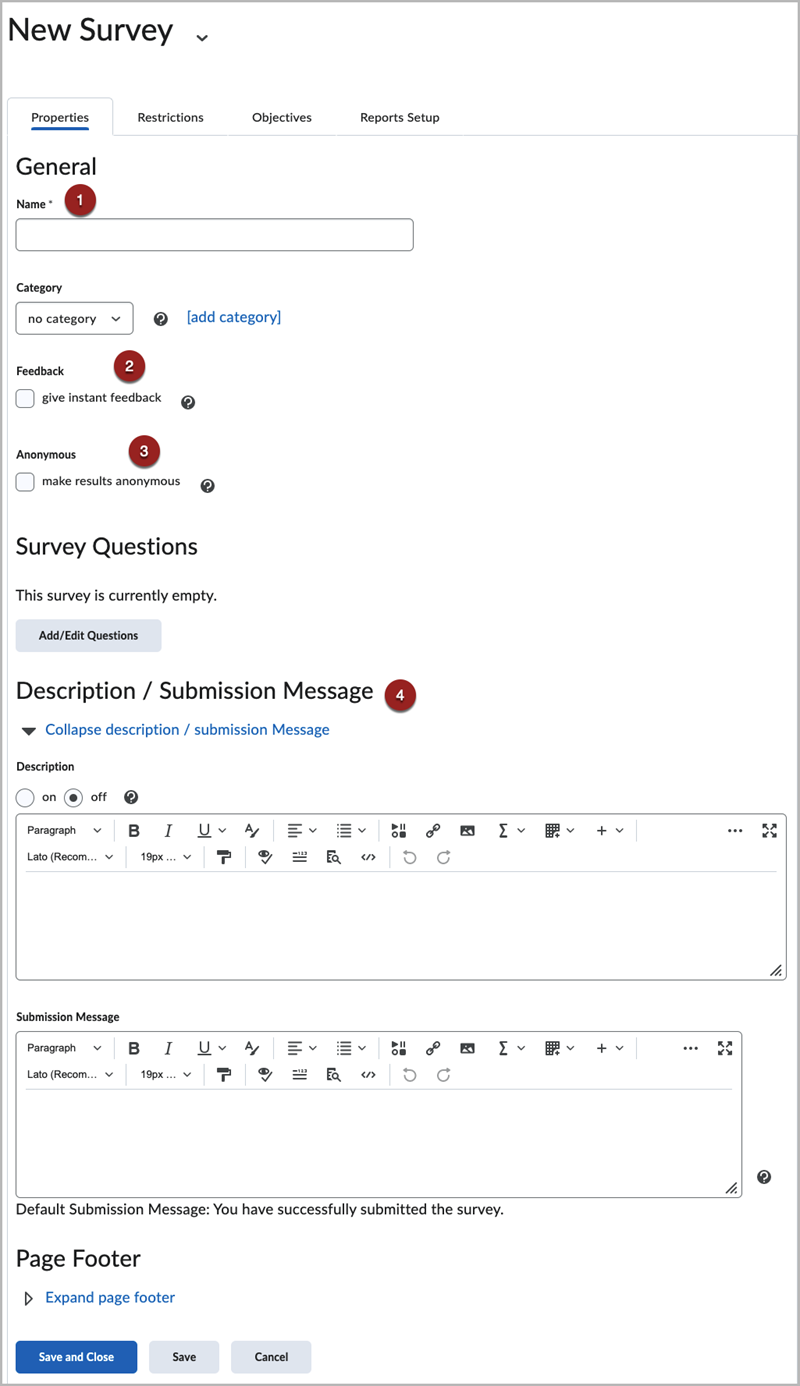
Fill in the following information in the Properties tab:
- Name: Enter a title for your survey.Category: If desired, assign the survey to a category (optional)
- Feedback: Show respondents feedback immediately after entering a response to a question.
- Anonymous: Check this box to make survey results anonymous, meaning that you will not be able to see who submitted each response. Note: Once enabled, this cannot be reversed.
- Description/Submission Message: Enter the text that respondents will see before they start the survey and after they submit the survey respectively.
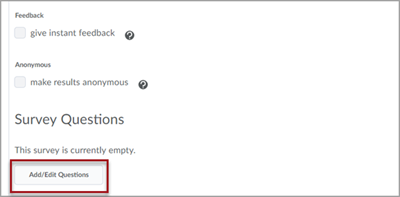
On the Survey Properties screen, click the Add/Edit Questions button to add items to the survey. This will take you to a new page.
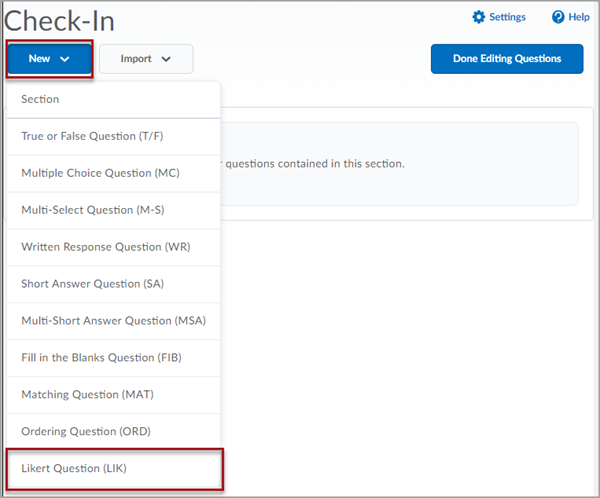
On the new page, click the blue New button towards the top of the page. Then, select the question type you would like to add from the dropdown. For these instructions, we will demonstrate adding a Likert Question to the survey.
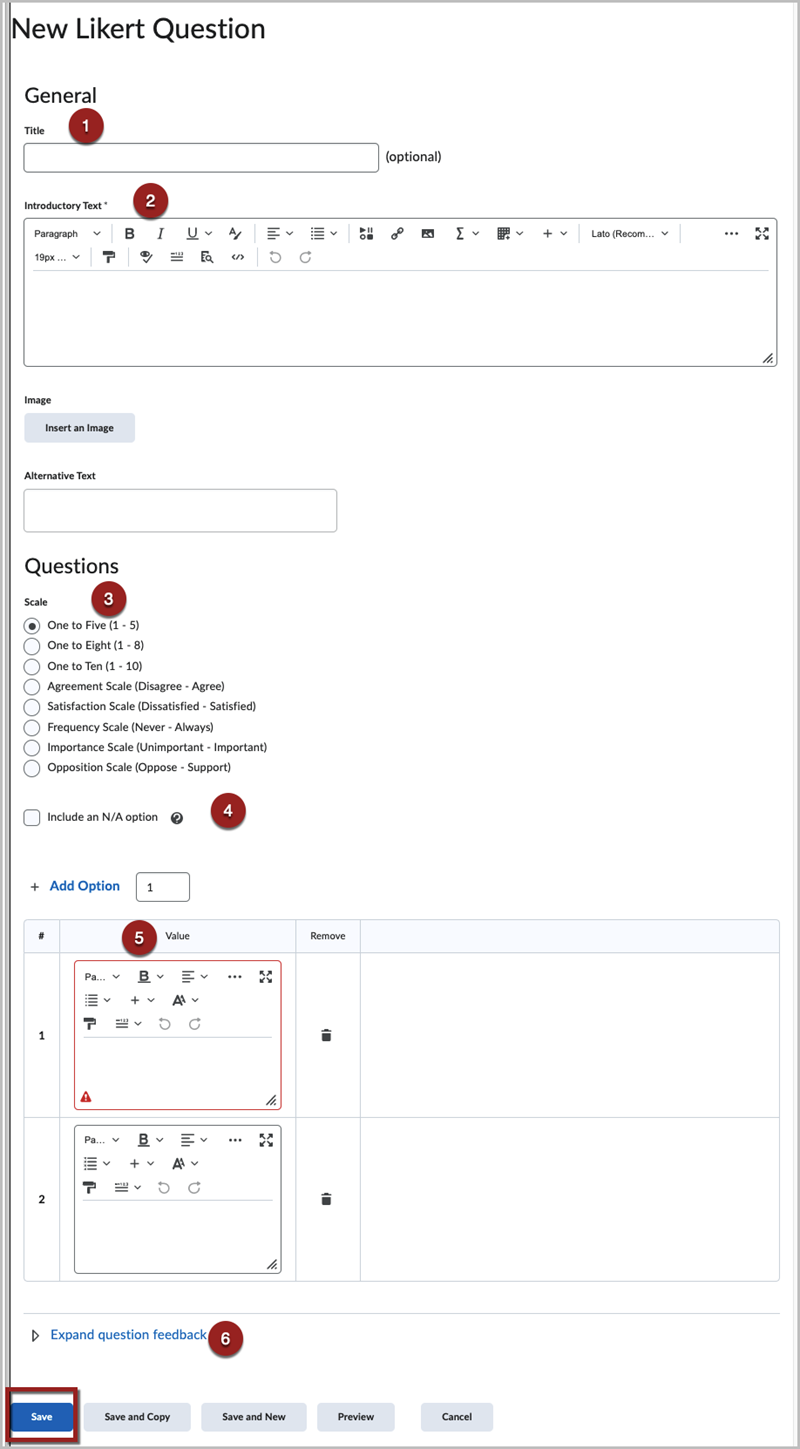
Fill in the information required for the question. This will vary depending on the question type. For a Likert type question, you will fill in the:
- Title: Give the question a short title (optional)
- Introductory Text: Provide introduction and context for the set of statements that respondents will rate.
- Scale: Select the scale that will be used in the responses.
- N/A Option: Give respondents the ability to not respond to a statement by give them the “Not Applicable” option.
- Options: Enter the statements that respondents will rate.
- Question Feedback: Enter the feedback that students can receive automatically or after they submit the survey, depending on your settings.
When you are finished entering the required information, click Save.
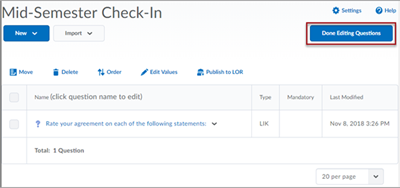
You will now see your survey item in the “Add/Edit Questions” area. Click Done Editing Questions to return to the Properties tab of the survey.
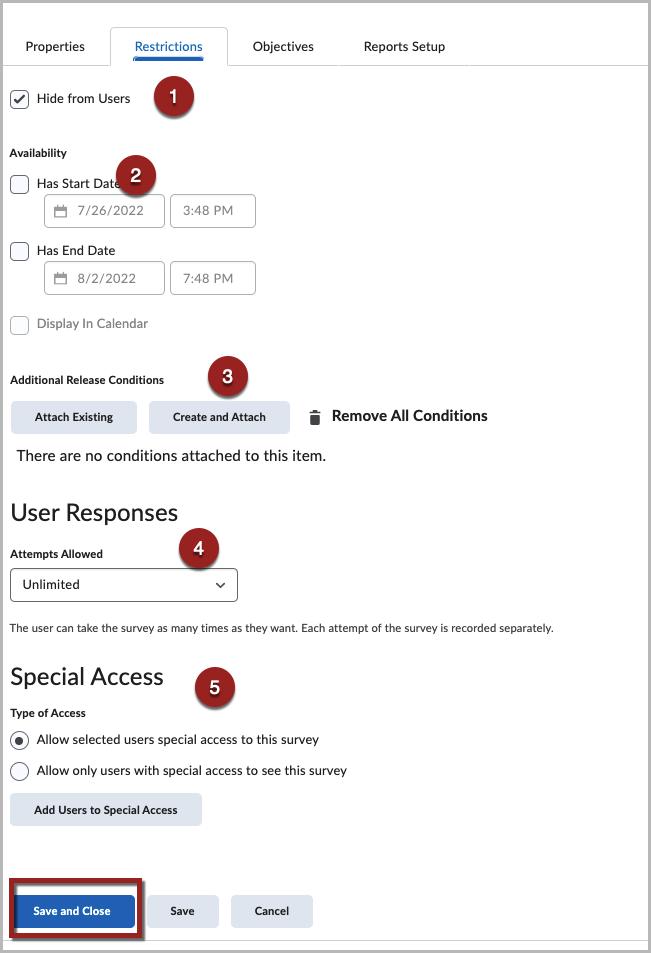
Go to the Restrictions tab. Under this tab, you can:
- Status: Uncheck the box to make the survey Active (available to respondents) or check the box to Hide from Users (not available to respondents)
- Dates: Enter a Start and End Date and Time for the survey. Also decide whether to list the survey in the course calendar (optional).
- Additional Release Conditions: Add release conditions to the survey to restrict access to it. More information on Release Conditions can be found here.
- User Responses: Define how many times a user can take a survey.
- Unlimited – Respondents can complete unlimited surveys, and each completed survey is recorded separately.
- Single attempt that is editable – Respondent can only complete one survey, but they can change their responses as long as the survey is available.
- Limited – Respondents can take the survey a limited number of time, and each completed survey is recorded separately.
- Special Access: Give modified access to specific users. More information on Special Access can be found here.
When you finish modifying the settings to the Survey, click Save and Close.