
Overview
Breakout Rooms allow you to split your Zoom meeting in up to 50 separate sessions. The meeting host or co-host(s) can choose to split the participants of the meeting into these separate sessions automatically, manually, or by letting participants choose. The meeting host/co-host(s) can also switch between sessions at any time. Using Breakout Rooms can be useful for recreating scenarios such as in-class discussion groups.
Note: You must use the Zoom desktop client for PC or Mac in order to start and manage breakout rooms.
Note: The self-selection feature requires both the meeting host(s) AND the participants to update their Zoom client to at least version 5.3.0. We highly recommend you make sure Zoom is up to date before running self-select breakout rooms. You can download the most recent version of the Zoom client or update your Zoom client by following the instructions on the Zoom Help Center.
Instructions
Starting Breakout Rooms
After scheduling your Zoom session, launch your meeting and when your students are in your meeting, click Breakout Rooms. A pop-up window will open.

Select the number of rooms you would like to create, and how you would like to assign your participants to those rooms:
- Automatically: Let Zoom split your participants up evenly into each of the rooms.
- Manually: Choose which participants you would like in each room.
- Let participants choose room: Allow participants to self-select into a breakout room.
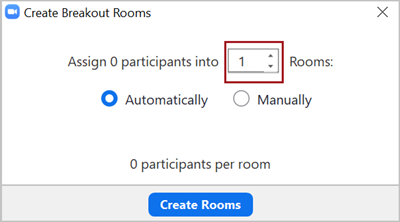
Click Create Rooms. Your rooms will be created but will not start automatically. When you are ready for the rooms to open, click the Open All Rooms button.
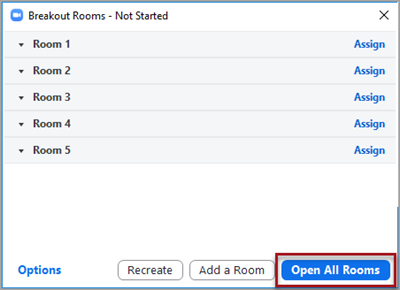
Manually assigning participants to Breakout Rooms
Select Assign to add participants in each breakout Room.
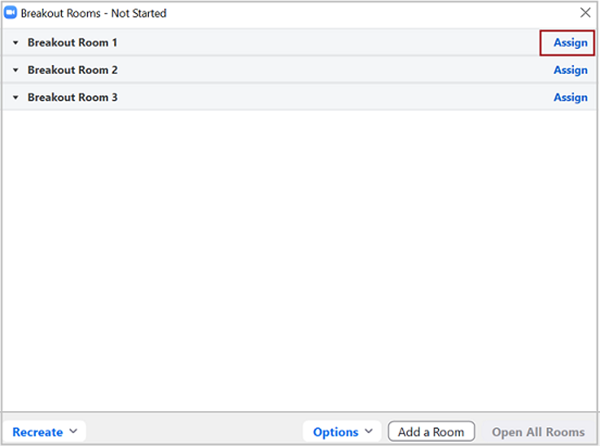
A popup will appear next to the selected room with a list of the meeting participants.

Select the checkbox next to each name to be added to that breakout room. Follow the same steps for each breakout room. Once a participant has been assigned to a breakout room a number will replace Assigned and the participants name will appear in the room list.

When finished adding participants, select Open All Rooms to start the breakout room sessions.