Overview
Announcements are a great way to communicate course updates, changes, and new information to your students quickly and effectively.
Creating an Announcement
To create an Announcements choose one of the following:
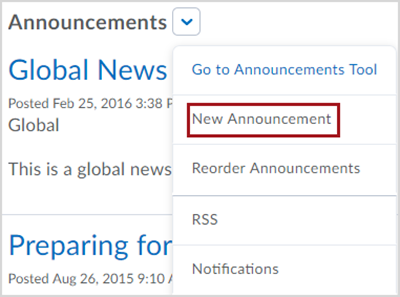
- Click the drop down on the widget and select New Announcement.
- Click the link that says Create an Announcement.
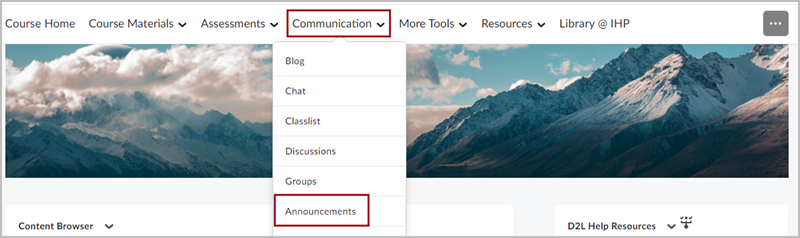
- Navigate to the Announcements tool under the Communications menu.

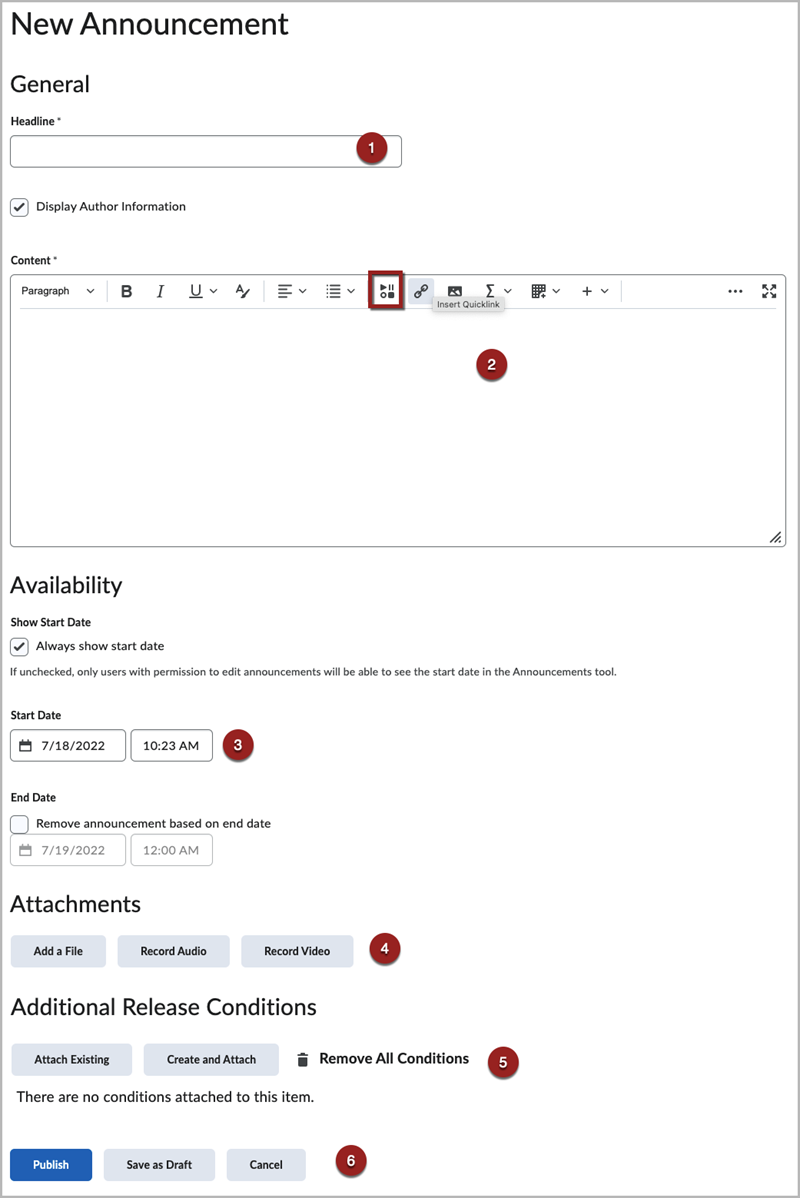
- Give your Announcement a title or Headline.
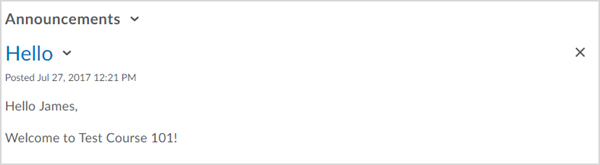
- Type your message into the WYSIWYG editor. The editor window allows you to insert video, images, set the font size and color, create tables and bullet lists among others. The editor also supports the use of Replace Strings for a more customizable experience for the user. In the example below the user that reads this message will see their name and the name of the course.
- Set the dates that the Announcement will be visible. You can set these in the future and have them expire if you wish.
- Attach a File or Audio up to 1 minute long. (optional)
- Attach a Release Condition. (optional)
- Select Publish to make it available (if a start date was selected it will become available then) or select Save as Draft.
When finished your Announcement will be displayed on the homepage under the Content Widget.