Overview
The Grade Setup Wizard allows you to customize the behavior of your grade book through a seven-step process. This page describes those seven steps and the decisions you will have to make in each of them.
Instructions
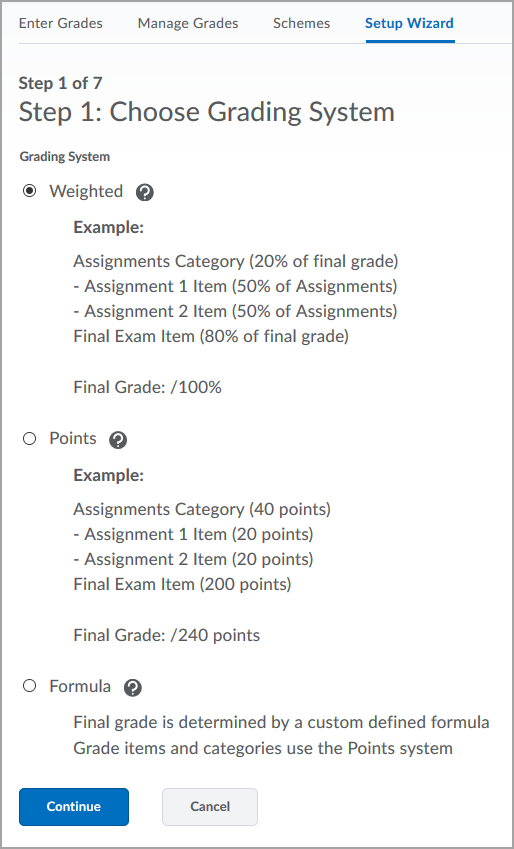
Step 1: Choose Grading System
There are three grading systems in D2L Brightspace: Weighted, Points, and Formula. We strongly recommend that you use the Weighted system that is on by default.
- Weighted: Each grade item or category is given a weight towards the final grade (e.g., the Assignments Category is worth 20% of the final grade in the image below) or towards the category it is part of (e.g., the Assignment 1 Item is worth 50% of the Assignments category). This allows you to easily ensure that each assignment or assessment is given the appropriate influence on the final grade.
- Points: The points awarded on an assignment define how much impact it has on the final grade. An item’s impact is relative to the point values of all other assignments.
- Formula: The formula system is nearly identical to the Point system, except that a custom made formula is used to determine final grades.
Step 2: Final Grade Released
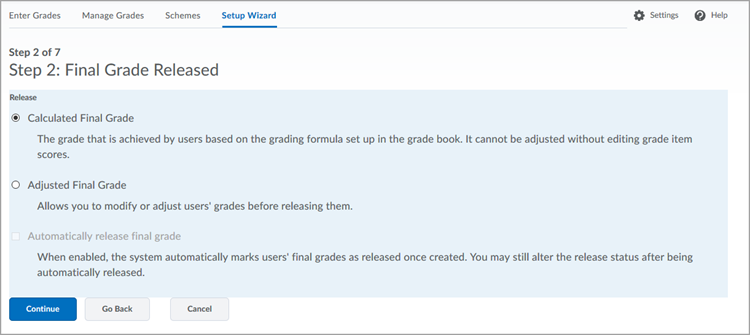
In this step, you decide the final grade that is released at the end of the semester:
- Calculated Final Grade: The final grade is solely based on the scores of the individual grade items and cannot be manually adjusted.
- Adjusted Final Grade: You can manually modify the grades before releasing them.
We recommend using the Adjusted Final Grade so that you have flexibility when determining final grades.
You can also decide to automatically release final grades within D2L Brightspace here, though we recommend handling this manually.
Step 3: Grade Calculations
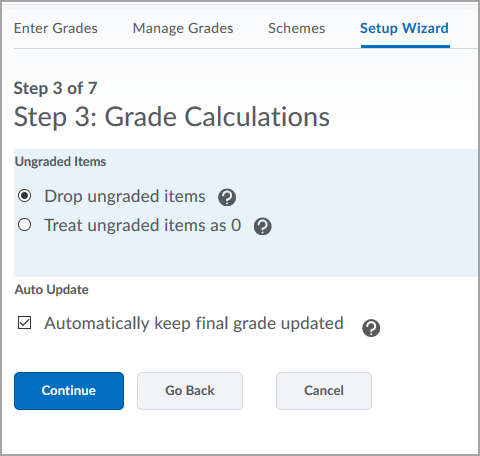
In this step, you can decide how you would like the grade book to handle items that have not yet been graded. You can:
- Drop ungraded items: This will not include ungraded items in the final grade calculation. For example, if there are 5 items in the grade book, each worth 20% of the total grade, and only two items have been graded, a student who got full credit on both items would have an 100% for their final grade.
- Treat ungraded items as 0: This will include ungraded items in the final grade calculations as zeroes. For example, if there are 5 items in the grade book, each worth 20% of the total grade, and only two items have been graded, a student who got full credit on both items would have a 40% for their final grade.
This step also gives you the option to update the final grade automatically, which we recommend keeping checked.
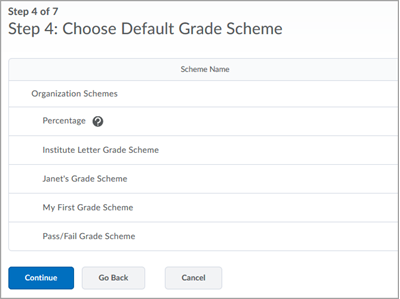
Step 4: Choose Default Grade Scheme
While you have the option to change your default grade scheme, we recommend leaving it as a “Percentage” scheme. More information about grade schemes can be found here.
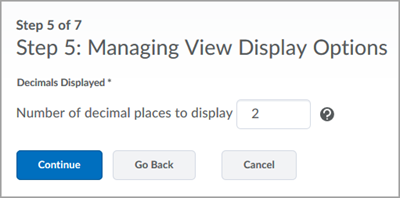
Step 5: Managing View Display Options
Here you can decide how many decimal places are displayed on items in the grade book for users with grading privileges (e.g., Faculty, TAs). We recommend using the default, which is 2 decimal places.
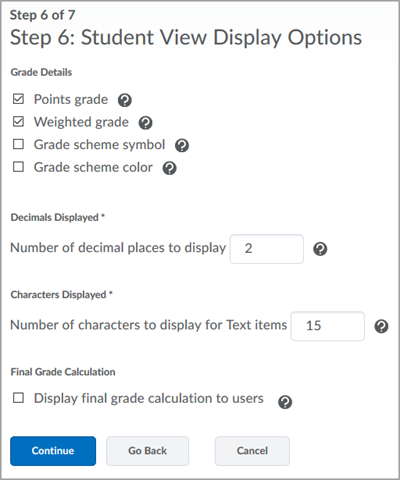
Step 6: Student View Display Options
Here you can decide what students will see when viewing items in the grade book.
In the Grade Details, you can decide how grades are displayed in the grade book. By default, students see the points earned on the assignment and the weight that is contributed to their overall grade. You can also allow the grades screen to display the symbol and/or color associated with the grade item where appropriate.
The “Decimals Displayed” and “Characters Displayed” options allow you to limit the decimal places displayed on numeric items and the characters displayed on text items.
Finally, you can decide whether or not to display how the student’s final grade was calculated.
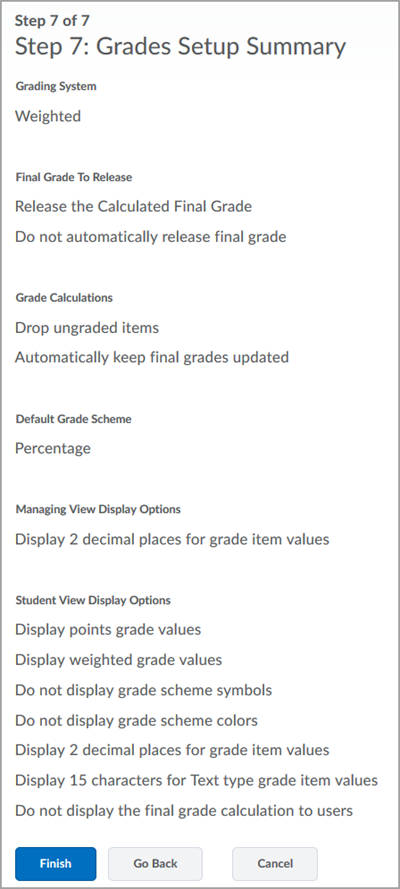
Step 7: Grades Setup Summary
Finally, you can review the grade options you selected and finish the setup process.