Overview
The D2L Brightspace Grades tool allows for the creation of an online grade book to track, manage, and calculate student grades. Once created, the grade book can be convenient for both students and instructors by providing access to grades across a semester as well as calculating final course grades.
What you need to know…
The D2L Brightspace Grades tool allows for the creation of an online grade book to track, manage, and calculate student grades. In order to successfully setup your grade book, you will need to understand the difference between an Item and a Category.
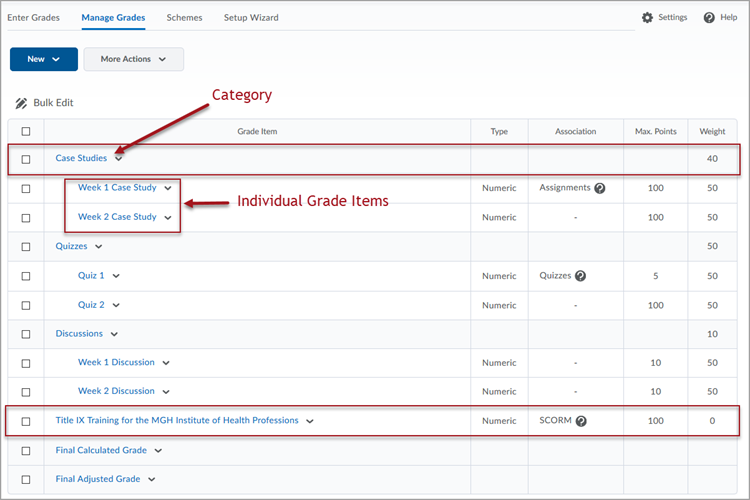
A Grade Item is an individual assignment such as an assignment submission, discussion or quiz. Each grade item will have its own entry in the grade book.
Grade book categories are way to organize and group related course items such as quizzes, discussions and assignment submissions. When grade items are grouped together in a category, you can choose to distribute points equally across all grade items within that category, as well as choose to drop the highest or lowest grade in the group.
In this guide we will use both Categories and Items.
Create a new grade category
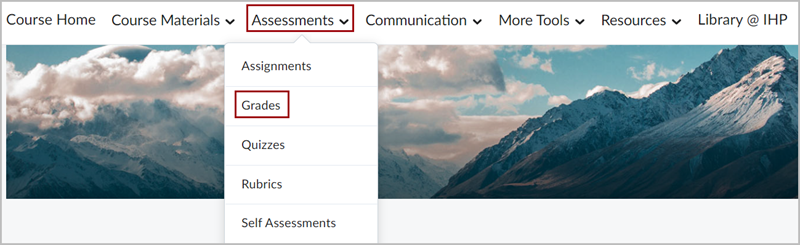
From your course homepage click on Grades within the Assessments menu.
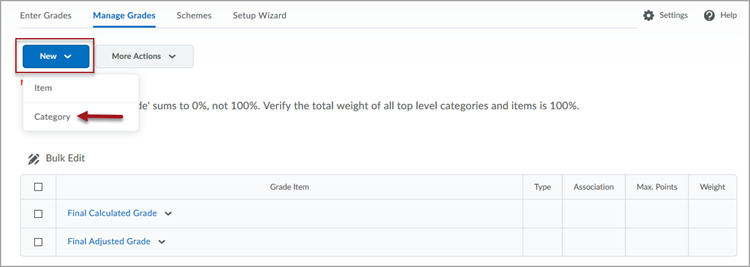
To create a new category, click New and select Category.
Properties tab
- In the Name field, give your grade category a name.
- Weight is the percentage that category is of the final grade.
- Distribution is where you can change the distribution of weight among the items in the category. For example, if the category is called Quizzes and all quizzes in that category are equally valued, you will choose Distribute weight evenly across all items. Here is where you can also choose to drop items.
- Display Options are optional settings. They are disabled by default but can allow you to display class average and grade distribution to each student.
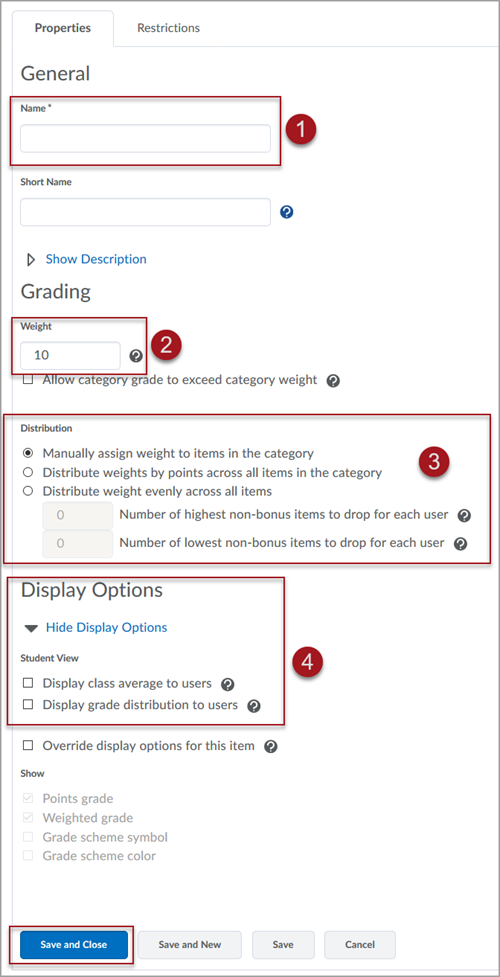
Click Save and Close.
Create a new grade item
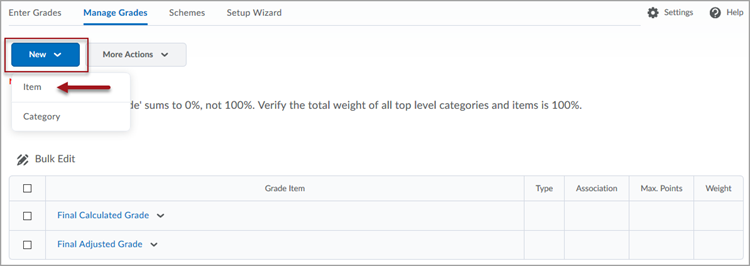
To create a new grade item, click New and select Item.
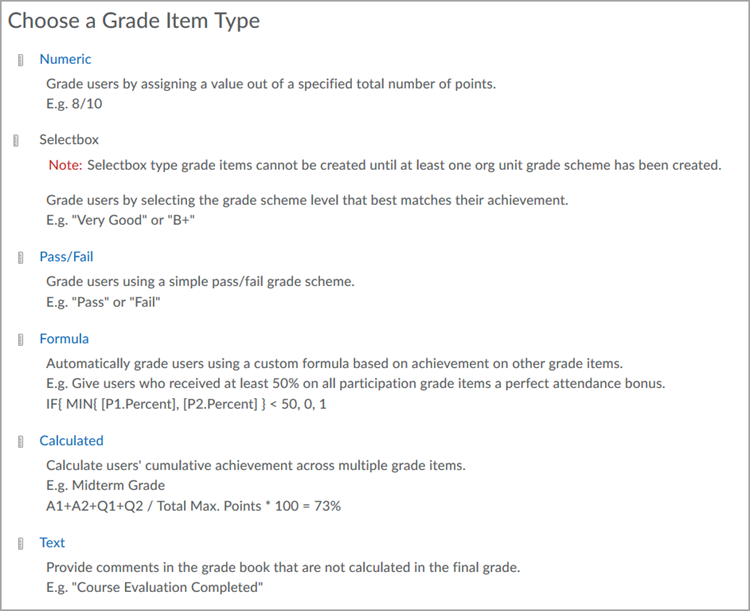
Choose how you will grade this grade item.
The most common grade item type is Numeric. This will grade users by assigning a value out of a specified total number of points. E.g. 90/100.
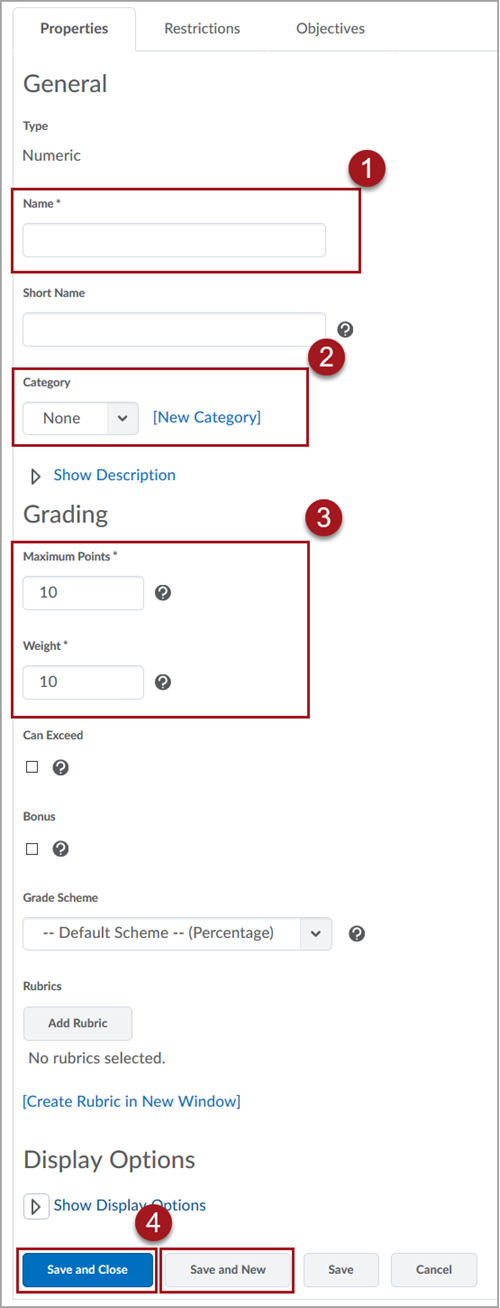
- Give the grade item a Name.
- If this grade item belongs in a Category, chose that Category from the dropdown menu here.
- Enter in the Maximum points for this item and the Weight of the item as it relates to either the final grade (if not part of a grade category) or the Category. If the grade item belongs in a category that is set to “Distribute weight evenly across all items”, this field will automatically populate.
- Click Save and Close or Save and New to save and create another grade item.
The below screen shot is an example of a completed grade book. To learn more about the structure of the grade book, see the Reading the Gradebook page.