Overview
Captions in Audio-Video files allow access to these file types by almost all persons. Captioning Audio-Video files can be done automatically in D2L Brightspace. To start the captioning process please follow the steps below.
Adding captions in Media Library
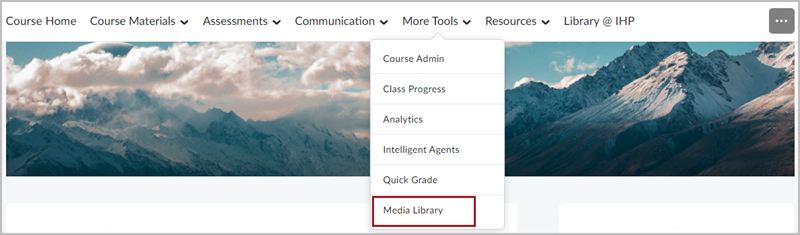
Enter a course in D2L Brightspace, select the More Tools tab then Media Library.
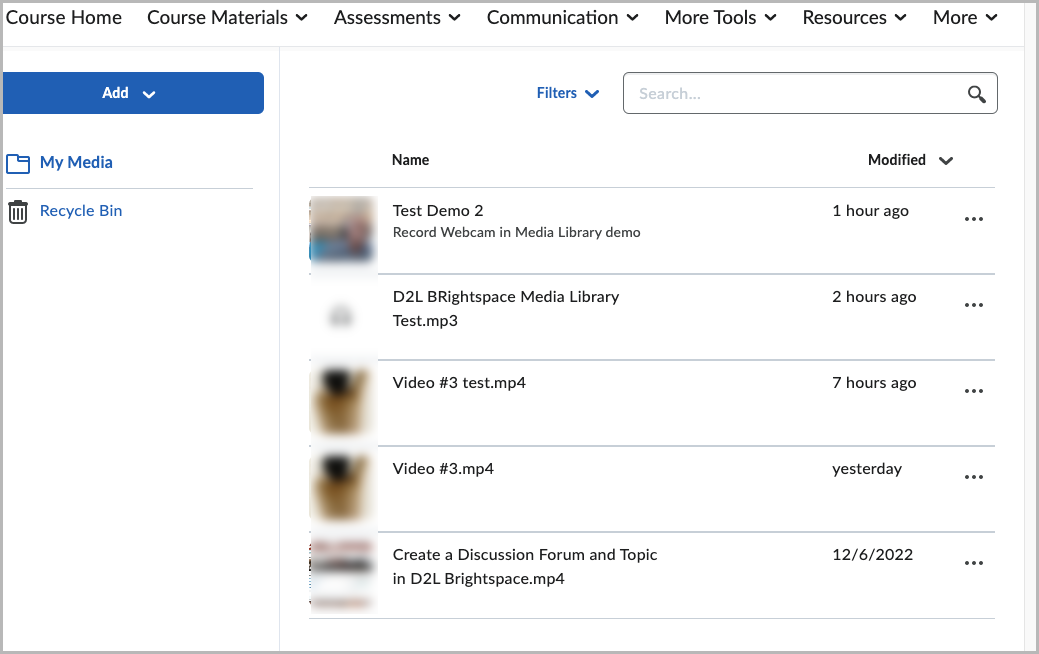
The Media Library repository opens
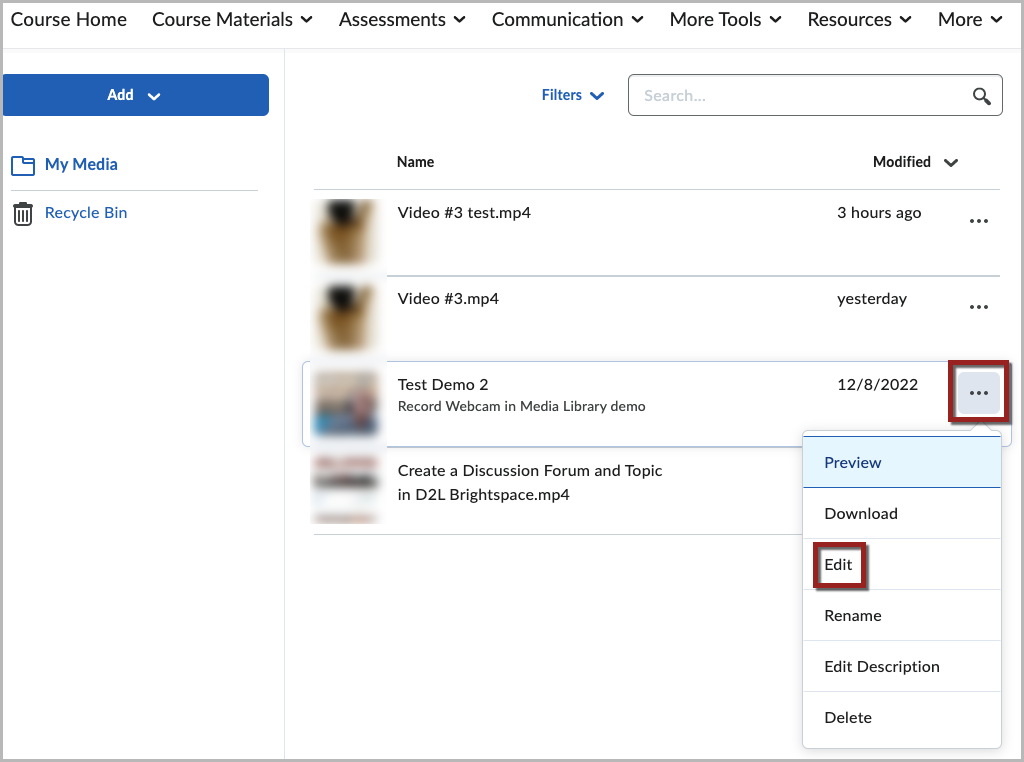
Select Options (…) on the Audio-video file to caption. From the Menu select Edit.
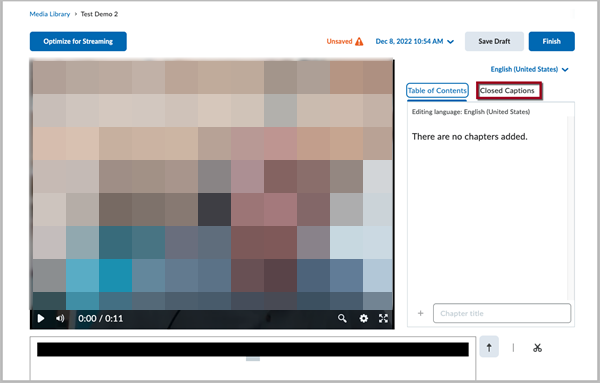
The file’s edit screen opens. Select the Closed Captions tab.
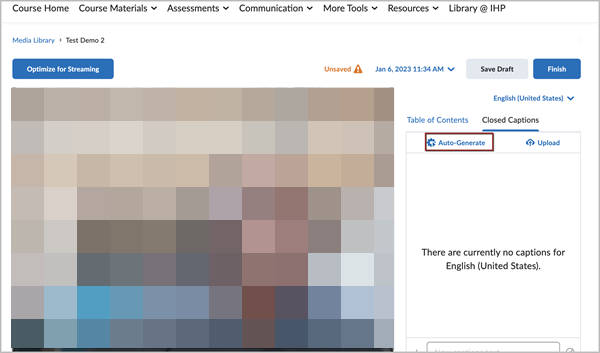
Select Auto-Generate.
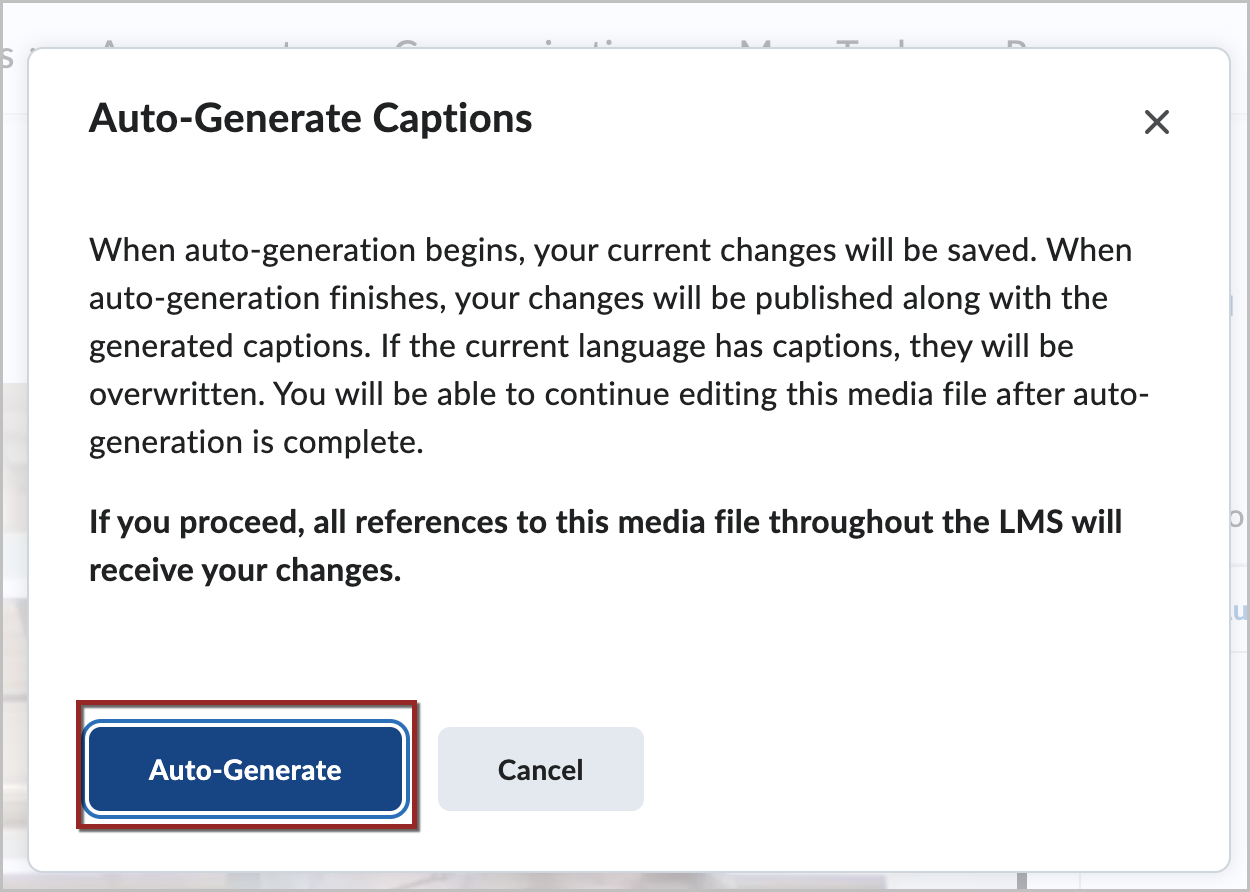
The Auto Generate Captions pop-appears, select the Auto-Generate button.
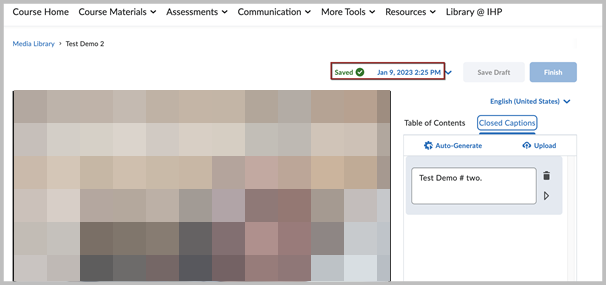
Once the captioning has completed, they will appear in the window under Auto-Generate.
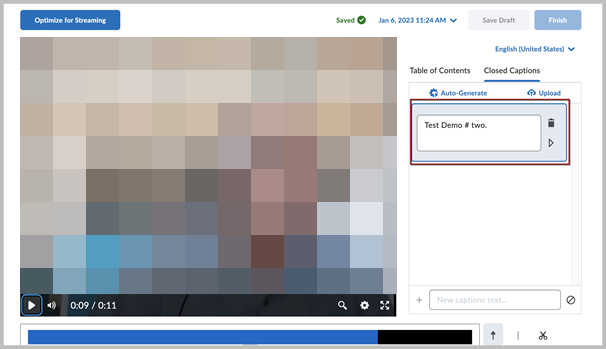
- Inside the generated captions allows editing the caption text.
- Selecting the Trash Can will delete the saved caption box.
- Selecting the Play button will expand the box and show the caption length/timing.
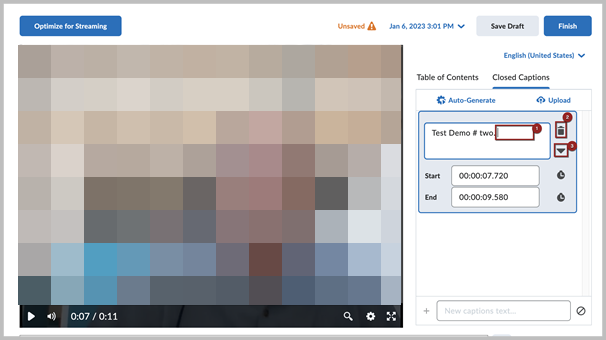
Select the Finish or Optimize for Streaming button to save any changes.
Once the process is finished Saved will appear in green with a date and time beside it.